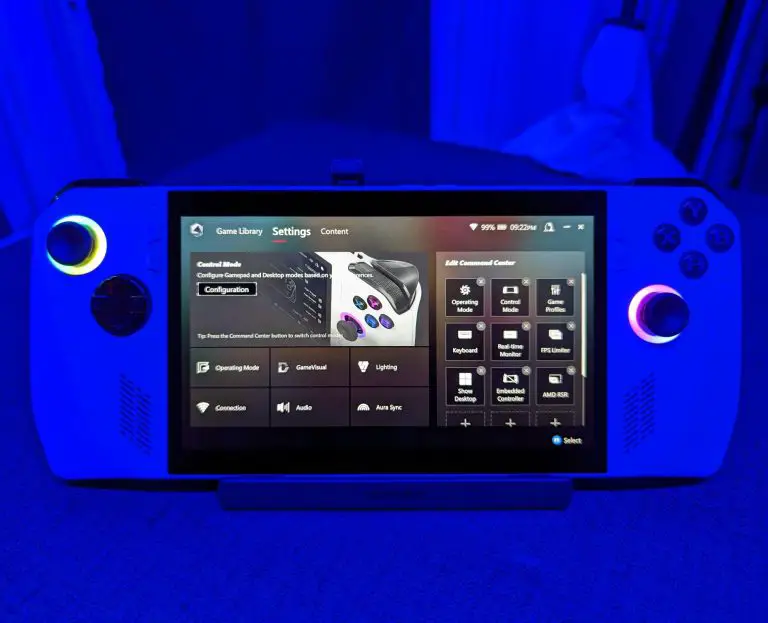
A joystick deadzone is an area around the center of the joystick where no input is registered. This can make it difficult to make precise movements with the joystick and can be incredibly frustrating in games that require a lot of joystick movement, such as first-person shooters.
The ROG Ally’s joystick deadzone issue has been reported by a number of users on Reddit and Facebook. Some users have reported that the deadzone is as large as 20%, making the joystick feel unresponsive and imprecise.
ASUS has acknowledged the joystick deadzone issue and is working on a fix. In the meantime, there is a workaround by u/RXavier91 that users can try if they’re wondering how to fix the deadzone issue on ROG Ally.
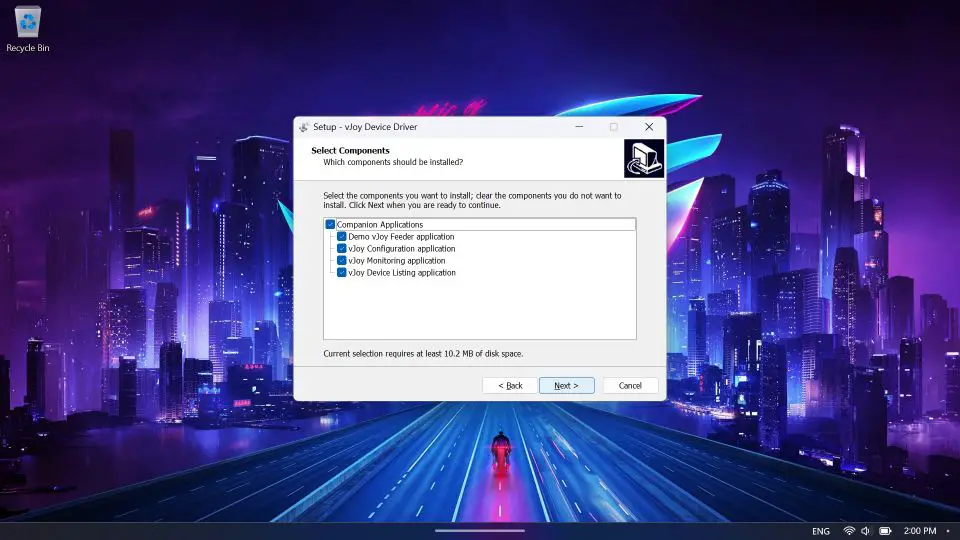
Step 1: Installing vJoy
vJoy is a virtual joystick driver that allows you to create virtual devices on the Ally, expanding the number of available controllers. To get started, follow these steps:
- Visit the GitHub repository for vJoy and download vJoySetup.exe.
- Run the installer and follow the on-screen instructions to complete the installation process.
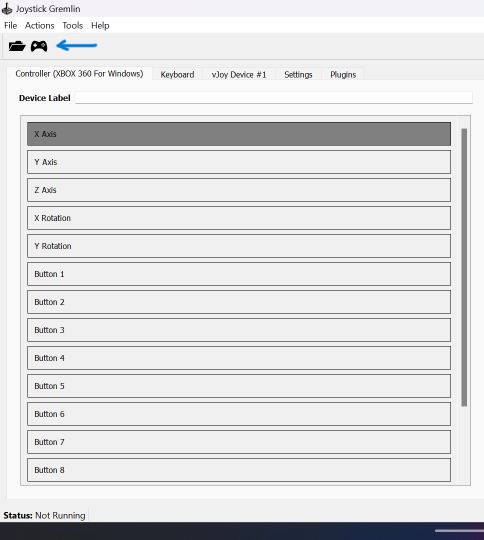
- Open the “Configure vJoy” application
- Change the number of buttons to 10
- Set POVs to 1
- Apply
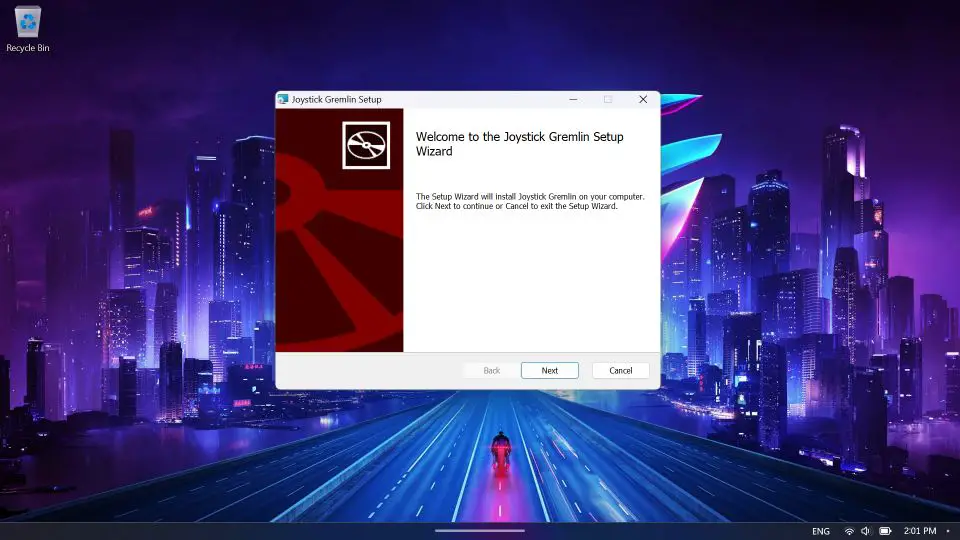
Step 2: Installing Joystick Gremlin
Joystick Gremlin is a tool that allows you to map and customize inputs from the Ally. It provides an intuitive interface and a wide range of configuration options. To install Joystick Gremlin, follow these steps:
- Visit the Joystick Gremlin website and download the MSI file (not the ZIP file)
- Run the installer and follow the on-screen instructions to complete the installation process.
Once installed, Joystick Gremlin will act as the bridge between your Ally and the virtual controller created by vJoy.
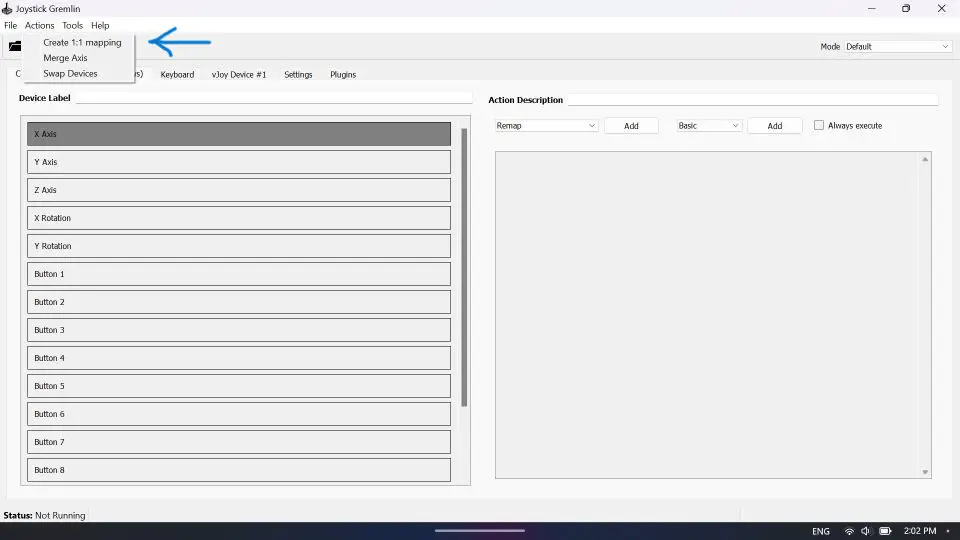
Step 3: Creating a 1:1 Mapping in Joystick Gremlin
Now that you have both vJoy and Joystick Gremlin installed, it’s time to create a 1:1 mapping between your Ally and the virtual device. This ensures that the inputs from your Ally are accurately translated to the virtual controller. Follow these steps:
- Launch Joystick Gremlin.
- In the main menu, click “Actions” and select “Create 1:1 Mapping.”
By creating a 1:1 mapping, you ensure that your virtual controller mirrors the behaviour of your physical controller.
Step 4: Enabling the Virtual Controller in Joystick Gremlin
To enable the virtual controller created by vJoy in Joystick Gremlin, click the button that resembles an Xbox controller. It should turn green, indicating that the virtual controller is active.
Step 5: Setting up USB Game Controllers in Windows
To ensure that your virtual controller is recognized by your games, you need to set it as your preferred device. Here’s how to do it:
- Click the “Start” button on your Windows taskbar and search for “Set up USB game controllers.”
- Select the search result that matches your query.
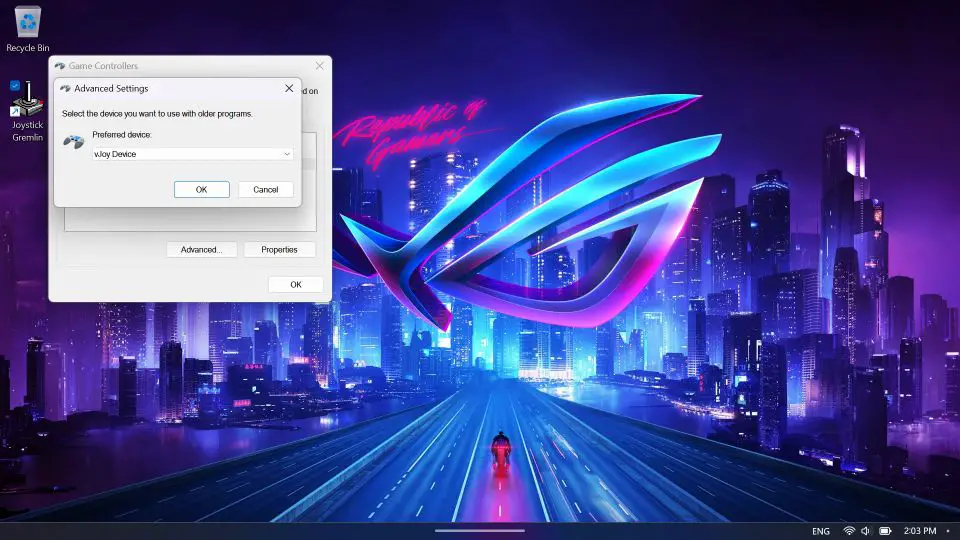
- In the “Game Controllers” window, click “Advanced.”
- From the drop-down menu, select “vJoy Device” as your preferred device.
- Click “Apply” and then “OK” to save the changes.
By setting vJoy Device as your preferred device, you ensure that your virtual controller is recognized by games and applications that rely on the standard game controller interface.
vJoy and Joystick Gremlin provide a powerful combination of fixing any deadzone issues that are you facing on your Ally. This is a good workaround for those who cannot wait until Asus provides a fix for this issue.
In the market for a power bank? Read our blog on the best power banks for ROG Ally.